memorablemeanders.blogspot.com

Showing posts with label Recipes - light meals. Show all posts

Saturday, November 12, 2011

Spicy Cabbage with Paneer

I  love Asian food. It's spicy, satisfying, tasty and has a lot of vegetarian options. Once a week I buy one or two cabbages at the local market. (Price per unit: KES20/US$.21!) Naomi shreds them and we store them in the fridge until I need them. I often serve it steamed with a knob of butter as a green vegetable. I also love coleslaw. Naomi used the cabbage in the lentil stew which she cooks for herself and Stanley.

But above all, I love Cabbage Curry. Recently I came across a recipe for spicy cabbage on the Internet. It's served with Paneer, a South Asian unsalted cheese made without using renette as a coagulating agent, and therefore suitable for vegetarians.

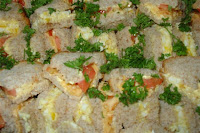
Top and bottom: Spicy Cabbage with Paneer

Spicy Cabbage with Paneer (Source: sulekha.com)
 (Serves 4-6)

1 Medium-sized green cabbage
200g Paneer cheese
1/4 tsp Chillie flakes
1/4 tsp Tumeric powder
1/4 tsp Mustard seeds
1/4 tsp Cumin (Jeera)
1 Small stick cinamon
1 tsp Salt
Curry leaves
1 tbs Vegetable oil
Bunch coriander/cilantro/dhania to garnish

Wash and shred cabbage finely. Set aside
Heat oil, add spices, except mustard seeds and fry gently
Cut paneer into blocks and add to spicy oil.
Fry until brown. Remove and drain on paper towel
Add mustard seeds to oil.
When seeds begin to pop, add cabbage
Fry for 10 minutes
Remove from pan. Arrange in serving dish.
Add paneer and garnish with coriander.
Serve hot

DE-LICIOUS!

Note: Never use olive oil in Asian cooking. Why? Because you don't see olive trees in India! Rather use vegetable oil or ghee, which is clarified butter.

I hope you're all having a wonderful weekend.

Blessings

Jo

Tuesday, April 19, 2011

Crumbed Camembert Kimwarer Valley-style

While in Nairobi at the end of January, I bought a wheel of Camembert. This week Grant and decided was a good time to enjoy it. I've posted about this dish before (here) but with a difference. These soft cheese parcels, dipped in egg wash, rolled in breadcrumbs and deepfried in olive oil, are normally served with strawberry coulis and whole green figs preserved in syrup.
White roses from the garden with potpourri of rose petals around the vase created a beautiful centrepiece
However, here in Kenya I've not been able to find any figs in syrup and decided to adapt the accompaniment accordingly. I subsequently made caramalised oranges, and once Grant had cooked the Camembert, I arranged the sweet, syrupy fruit alongside as the perfect foil for the rich and delicious protein. I also replaced the strawberry coulis with Confiture de Cerises Noir / Black Cherry Preserve which is what I had in my pantry.
Crumbed Camembert with Caramelised Orange and Black Cherry Preserve. It's every bit as delicious as it looks

And yes, it called for a formal table setting; centrepiece of rose petals, flowers in jam bottle, candles in ashtrays and ice-cold H2O a la water dispenser!

Caramelised Oranges - wwww.Nigella.com (I tweaked the recipe as not everything is available here in the valley)

6 navel oranges or any small thin-skinned variety

500g caster sugar - I used brown
250ml water - I only used 100ml water
8 cardamom pods, crushed - I added cinnamon sticks


Method
Using a small sharp knife, cut a thin slice off the top and bottom of the oranges, and then slice off the skin vertically, turning the orange as you go, being careful to keep as much flesh as possible but removing all pith.
Slice each orange into 5mm rounds, trying to reserve as much juice as you can.
Just plonk the slices, pouring the juices, into a bowl as you cut them. Or just cut them straight into something like a lasagne dish.
To make the caramel, put the sugar, water and cardamom pods into a large saucepan and swirl (not stir) a little to dissolve the sugar. Then slowly bring to the boil without stirring, until the syrup becomes a dark amber colour.
Take the saucepan off the heat and tip in the oranges and any juice that's collected in the bowl. Quickly coat the orange slices in the caramel and pour on to a flat plate; act with speed otherwise the caramel will set before you can get it out of the saucepan.
If you can pick out the cardamom pods without burning your fingers, great, but there's no need to get too exercised about it: let those eating do a little work as well. Let the oranges cool, and then put them in the fridge to chill for a little while.


Nigella posted this recipe as a dessert with Greek yoghurt. So if you're not a fan of the cheese we enjoyed it with, why not try it this way and really wow your dinner guests!

For more of other people's worlds, click here


Saturday, September 25, 2010

Khartoum Samoosas

I've had so many kind comments on my desert posts and recently almost everyone who commented has loved the shepherd and his sheep. I'm changing my blog header photo regularly now, so I have uploaded this photo for the next few days.


Every Friday or Saturday night I make spring rolls for dinner. One night I made samoosas from a recipe in an Afrikaans magazine. Since then Grant has requested samoosas instead of spring rolls. I found a vegetarian samoosa recipe on the Internet so I can enjoy samoosas as well.

Grant and I both grew up in Natal, a province in South Africa which boasts the best traditional Indian curries and spicy dishes in the country. Samoosas are normally made by Indian ladies and if you're blessed to know one, you will  often be the recipient of such a culinary treat.

Samosas are the perfect chaat, or Indian snack food. These tetrahedral pastry pockets are made with a variety of stuffings, both vegetarian and with meat. But a simple spiced potato and pea filling is the most popular.

Samoosas are also sold frozen in supermarkets (here in Khartoum as well) but since I've learnt to make these delightful little spicy triangles, we've never eaten the bought variety again. I managed to find Samoosa leaves (pastry strips) in the supermarket. These are a lot simpler to use than a large sheet of filo pastry which you have to cut into strips yourself.

Here is the meaty variety:

Minced meat samoosas (Vrouekeur 30 July 2010)
Approximately 24 samoosas


Ingredients
45ml Olive oil
2 onions, chopped
500g lean minced beef
5ml masala
5ml tumeric powder
5ml cumin powder
Pinch of cayenne pepper
Salt and black pepper to taste
1 packet samoosa leaves (I found a pack with 50 leaves in our local supermarket)
125ml melted butter
750ml Olive oil for deep frying

Method
Heat the oil and saute onion until soft
Add the minced meat and cook until done
Add the masala, tumeric, cayenne pepper, salt and black pepper
Cook until most of the liquid has been reduced
Remove from heat and allow to cool
Place strips of samoosa leaves on a board, paint with melted butter
Add a teaspoon of cooled curried mince at one end
Fold the edge over the meat mixture
Repeat the process until you reach the end of the leaf
Deep fry the samoosas until golden brown
Drain on paper towel
Serve hot with chutney on the side


Vegetarian Samoosas www.whats4eats.com
Aproximately 12 samoosas
Ingredients
1/4 cup oil
1 onion, minced
1 tbs gingertoot, minced
1 tbs coriander, chopped
2 large potatoes, peeled, cooked and cooled
1 cup frozen peas, cooked and cooled
100ml melted butter
Salt and black pepper to taste

Method
Fry onion and ginger in a oil until soft
Roughly mash potatoes and add
Add peas, coriander and seasoning
Toss to mix all the flavours and allow to cool
Brush melted butter onto samoosa leaf
Place a little of the mixture at the top of the leaf
Fold the edge diagonally over the mixture
Repeat until the end
Deepfry until golden brown
Drain on paper towel
Serve hot with chutney on the side

Try them, you will be so glad you did!

The Arabic for potatoes is al-Bţāţs (this is not as difficult to pronounce as it looks = a Badaatis)

Saturday, August 21, 2010

Tuna and Olive Pasta

Tuna and Olive Pasta - really easy


While flying up to the Sudan at the beginning of the month, I had brought a magazine to browse through on the flight.  I came across several delicious recipes. One was headed "Really easy" and when I showed it to Grant he groaned and said if only he had that to eat rather than the standard: "chicken or beef" he knew he'd be offered at dinnertime!

This week I decided to make it and it really is easy.

Tuna and Olive Pasta (Vrouekeur, July 2010)
(serves 4)

500g penne pasta
a dollop of oil for frying
1onion, chopped
2.5ml minced garlic
400g tinned whole tomatoes
170g (1 tin) tuna in brine. (I used in oil)
45ml black olives, sliced

Cook pasta in salted boiling water until al dente
Drain the pasta and add a little oil to keep it from clogging
Heat a little oil and sautee the garlic and onion until soft
Add tomatoes, salt and ground black pepper
Cook without a lid until all the juice is reduced
Add tuna and olives and heat through gently
Toss mixture into pasta and serve immediately

Delicious!

The Arabic for tuna is either twnh (pronounced too-naah) or smk pronounced samaka. The Arabic for tomatoes is țmãțm pronounced toemaatum

Thursday, August 12, 2010

Khartoum Spring Rolls

Homemade spring rolls made and cooked in the kitchen before we replaced the broken ceiling fan!

While in the transit lounge in Addis Ababa on our flight  from Johannesburg to Khartoum last week, we sat at a pub and had a cold drink. Grant said he was peckish and ordered us two portions of vegetarian spring rolls at US$1 a portion. When the spring rolls arrived, we realised we should have ordered only one portion as there were eight rolls on each plate. Once we'd bitten into the first spring roll, we realised we should have maybe ordered a plate of chips or a toasted sandwich. The springroll pastry was underdone and not at all tasty. However, we plouged through two each before we gave up and left the rest.

Now, you'd say: are these people connoisseurs when it comes to spring rolls, or what? Well, we'd like to think so! (lol!) During the past few months here in Khartoum, Grant and I have perfected the ultimate springroll - home made! Grant does all the vegetable shredding. He has the patience and really shreds the carrots, onions and cabbage finely. He chops the garlic finely and grates the ginger. So he is the man who goes up ahead and prepares the filling for the spring rolls. When he has each item in a seperate dish, I move in.

I 've also discovered the exact squares for spring rolls in the supermarket. Back home in South Africa, we've only managed to find long rolls of paper- thin phyllo pastry which are impossible to work with and have to be cut to size.

Last week, I stood in the very hot [pre-new-ceiling fan-] kitchen and filled each square with filling and folded them over. Don't be put off by the seemingly labour-intensivity of this job. It's actually a simple procedure, and the more you make the quicker they go. Ask me, I've been making them once a week, for the entire three-month stint we spent before we went out on our break. And once in South Africa while we were on leave!

I popped them into a pot of boiling olive oil- four at a time - and cooked them until brown and crisp. (this was really hot work, phew!)

Remove and drain on papertowel.

Serve with individual bowls of soy sauce and Thai sweet chillie sauce.  Yum!

We've found a samoosa recipe in a South African magazine and we'll be making these with mince and a vegetarian option over the weekend.


Spring Rolls (Source Internet)

Makes 24 Rolls

Ingredients

1 ounce fine cellophane noodle - I used instant noodles, sans the seasoning
2 tablespoons olive oil
2 garlic cloves, crushed
1/2 teaspoon fresh ginger, grated
 2 scallions, finely chopped (Spring onions)
1/2 cup bean sprouts - I omitted these, as none in the city
1/2 cup green cabbage, shredded
1 small carrot, peeled and finely shredded
1/2 teaspoon olive oil
1 tablespoon light soy sauce
• 1 tablespoon rice wine or dry sherry - I omit this, no alcohol in the Sudan
1/4 teaspoon ground black pepper
1 tablespoon chopped fresh cilantro - called coriander here
1 tablespoon chopped fresh mint
 spring roll wrappers


Method
Place the noodles in a bowl and pour over enough boiling water to cover. Allow to stand for 4 minutes.
Drain, rinse in cold water and drain again.
Cut into 2-inch lengths. With instant noodles, I hold a bunch up with a fork and cut it with the kitchen scissors. Works for me!
Heat the olive oil in a wok over high heat.
Add the garlic, ginger, scallions, beansprouts, cabbage and carrot and fry for a minute. (Enjoy the most DI-VINE fragrance emitting from the wok at this stage!)
Stir in the sesame oil, soy sauce, rice wine, pepper, cilantro/spring onions and mint and take off the heat.
Stir in the noodles.
Arrange the wrappers on the counter, pointing diagonally.
Spoon a bit of the filling onto the bottom corner of the wrapper.
Roll the point of the wrapper over the filling, then fold the side points inward over the filling.
Continue to roll up the wrapper away from you, using a bit of water to seal the roll if needed.
Brush with oil and bake in a 400 °F oven until crispy, about 15-20 minutes.
You may want to flip the spring rolls halfway through baking.
You can also freeze these unbaked and then bake from frozen. This will take about 25 minutes.
(I fried the spring rolls and froze those which were left over. When I reheated them, I placed them in an oven and baked until crisp again)

Thursday, June 3, 2010

Orange and butternut soup

Sarie Kos/Sarie Food is a  quarterly Afrikaans food magazine affiliated to the favourite South Africn women's magazine  "Sarie". To translate:  - on the cover: (clockwise from the title) "my inspiration" above the title, and Autumn 2010 underneath it; 8 easy pasta sauces, Feel-good home cooked food, Soccer feast for the World Cup Soccer kick-off in South Africa on 11 June , 6 dream cheese cakes and chocolate cake in a mug (only 5 minutes!)

The day before I left South Africa to come back to the Sudan, my dear friend, Ida invited me to tea. We enjoyed delicious muffins, cream and jam on the deck in her beautiful garden. Even though I'd been home for three weeks, we'd only seen each other at mutual friend's houses and in the street; so this was a golden opportunity to catch up on each other's family news. She spoilt me thoroughly with a "going away" gift which included a packet of mixed herb seeds  - I've planted them in a container in my flat - and a glossy magazine. Sarie (a woman's name) is a South African women's magazine which I can remember as a child. Now there is also Sarie Kos (Sarie Food) magazine. (photographed above)  Wow, what a stylish and tasteful magazine. You just want to cook and bake (and eat, yikes!) as you flip through its glossy pages. I did! I made the delicious Orange and butternut soup for dinner when we returned from my last visit to the dentist this week. (yes, my root canal has been done and painlessly too)


A weekly bargaining session at the fruit market forces me to use my newly-learnt Arabic. When I think the price is not acceptable (I know how to ask: how much is a dozen oranges?) I reply that it's too expensive. I've also learnt to say: I know prices! (In other words, don't try to rip me off!) And so the bargaining progresses until I and the vendor agree we've both won!


Deliciously different: Butternut and Orange soup

Orange and Butternut Soup Sarie Kos Autumn 2010
(The combination of orange and butternut is a classic recipe)
Serves 6
50ml Olive oil
1 onion, finely chopped
1kg butternut, cut into blocks
300ml vegetable stock
2 slices orange rind
500ml orange juice
Salt and freshly ground black pepper

Heat oil in saucepan. Brown the onion until soft and transparent
Add the butternut and brown for a further 5 minutes
Add the vegetable stock and orange rind
Remove from heat and add the orange juice
Allow to cool and blend in food processor until smooth
Season with salt and ground black pepper
Heat before serving.

I don't have a food processor here in Khartoum. I used a sieve to achieve the smooth consitency visible in the above photo.

Thursday, May 13, 2010

Delicious Middle Eastern Fare...

Falafels - easy to make, delicious and you can freeze them. I added chopped spring onions to the recipe

Falafel is very popular in the Middle East as a fast food. As a main dish, it is served as a sandwich, stuffed in pita bread with lettuce, tomatoes, and tahini. As an appetizer, it is served on a salad, or with hummus and tahini. Falafel is a favorite among vegetarians.

In Egypt, McDonald's has their version of a falafel sandwich. Can you guess the name? McFalafel, of course.

As you can imagine, being a vegetarian, I love chickpeas and have found many recipes containing them. Yesterday I made a batch of falafels and froze them. When hubby has his hamburgers, I will make a schwarma for myself . We get the most divine pitas in the neighbourhood. You can read about my trip to the bakery to buy these here.


Falafel (http://www.about.com/)


Ingredients:
• 16 oz. can of chickpeas or garbanzo beans.
• 1 large onion, chopped
• 2 cloves of garlic, chopped
• 3 tablespoons of fresh parsley, chopped
• 1 teaspoon coriander
• 1 teaspoon cumin
• 2 tablespoons flour
• Salt and pepper

(I added chopped spring onions)


Method:
Drain the chickpeas and mash roughly.
Combine chickpeas, garlic, onion, coriander, cumin, salt and pepper (to taste) in medium bowl. Add flour.

Mix ingredients together. You can also combine ingredients in a food processor. You want the result to be a thick paste. (I don't have a processor here in Khartoum)

Form the mixture into small balls, about the size of a ping pong ball. Flatten slightly.

Fry in 2 inches of hot olive oil until golden brown (5-7 minutes).

Delicious hot or cold

Wednesday, September 30, 2009

Roast Vegetable Tart

This roast vegetable tart is healthy, tasty and so easy to make


Once again, I've made a delicious meal from a recipe in one of my favourite food magazines. I've posted about this before: a large food chain store publishes its own food magazine which contains ingredients and products sold on the shelves. Last week I served the above roast vegetable tart as light supper meal; it went down a treat.
Roast Vegetable Tart (PnP Fresh Living Magazine September 2009)

A fabulous light meal served with mashed potatoes and a crisp green salad.
(Serves 4)

1 roll puff pastry (defrosted)
1 extra large egg, beaten
1 cup ricotta cheese (I used fat-free cottage cheese)
1 bunch (200g) asparagus, washed and trimmed
1 packet (250g) cherry tomatoes, halved
½ packet back bacon, cut into strips (I omitted this; vegetarians were in the majority!)
Salt and ground black pepper
½ tub basil pesto
Rocket, for serving

Preheat oven to 200°C.
Trim edges of the pastry; this helps it to rise better
Use a butter knife to gently score a 2cm border onto pasty.
Take care not to cut all the way through.
Place the pastry on a greased baking tray
Lightly brush scored pastry border with egg
Roughly spread ricotta onto pastry, excluding border
Toss asparagus, tomatoes, bacon and seasoning into a bowl
Season and scatter on top of ricotta
Bake for 25 – 30 minutes, until cooked through and golden brown
Serve drizzled with pesto and top with rocket

Thursday, August 6, 2009

Upmarket Cheese on Toast


On Sunday evening I felt like a light supper. I wanted something cheesy but couldn’t face cheese on toast. Then I remembered how, while at boarding school all 40 years ago, we often had Welsh Rarebit as Sunday night supper.

I popped onto Google and within minutes I had the perfect recipe. I've posted the original recipe below but also adapted it to make it diet-friendly. My ingredients are in brackets. Welsh Rarebit is traditionally made with strong cheddar cheese but I dispensed with tradition in order to make this recipe user-friendly to anyone following a healthy, weight-reducing lifestyle.

Enjoy.

Welsh Rarebit (Courtesy Avocado Magazine)

(Serves 2 – 2 Slices each)

30ml flour (I used whole-wheat flour)
30g butter (I used lite/reduced fat margarine)
200ml milk (I used skimmed milk)
150g strong cheddar cheese (I used low-fat hard cheese)
2.5ml Hot English Mustard powder
Salt and ground black pepper


Method:
Preheat the grill
Melt the butter and add the flour to make a roux
Add the milk and stir
Allow mixture to cook until thickened
Tip in the cheese with the mustard and stir vigorously
Spoon mixture onto slices of freshly made whole wheat toast
Season with salt and ground black pepper
Brown for a few minutes under the grill

Thursday, July 9, 2009

Zucchini Fritatta

Saute the grated Zucchini's in olive oil

A frittata is a large farmhouse style Italian omelette with various fillings, often made to use up leftovers. They are perfect as light meals, served with a bitter leaf salad. This frittata is also delicious served with a meat or fresh tomato sauce. Feta cheese is not Italian (they would use something like Pecorino), but it compliments courgettes (Zucchini) extremely well. Other vegetables that would work well include cauliflower, broccoli, potatoes, onions, asparagus, artichokes and tomatoes.
I added cherry tomatoes as my own variation of the recipe

The fritatta just before it is placed under the grill to brown

Zucchini and cherry tomato fritatta - don't be deceived by the small portion; it is very filling.


Zucchini Fritatta (http://www.food24.com/)
Serves: 6 people

INGREDIENTS
Olive oil for frying
900g small courgettes (zucchini), trimmed and coarsely grated
6 eggs
1/3 cup milk or cream (I use fat-free milk)
Pinch of freshly grated nutmeg
Salt and freshly ground pepper
3 discs feta (crumbed) (I only use one)
12 fresh basil leaves, torn into pieces

INSTRUCTIONS
Preheat the oven to grill
Coat the bottom of a frying pan with oil, heat and fry the courgettes until all the liquid has evaporated and they begin to change colour - ±10 minutes.

Transfer to a bowl
Break the eggs into a bowl, add the milk (or cream), nutmeg and salt to taste, and beat well. Add the courgettes, feta and basil, and mix well
Coat a large frying pan well, that will hold the mixture to a 3cm -5cm depth, heat, then add the mixture. Fry over a low heat, with the pan covered for ±15 minutes, or until well set
Remove the lid. Place under the preheated grill to brown the top
Remove from the grill, allow to stand for ±10 minutes and then transfer to a serving platter.

Cut into wedges for serving.

Monday, June 1, 2009

Farfalle with Cherry Tomatoes, Olives and Basil

I found this recipe in a magazine when we visited our friend’s guest house in Kwa-Zulu Natal. This is the same guest house on the banks of the Mooi River which hosts about half a dozen very large crocodiles. You can read about this here. My friend kindly allowed me to bring the magazine home but I didn't make the dish for a long while because I was looking for the special pasta: farfalle. I eventually found a packet of farfalloni in Woolworths in the city and could test the recipe.

Farfalle or farfalloni is translated from Italian as “cravatta a farfalla” (butterfly ties). According to the packet, it combines perfectly with hearty sauces and can be used in cheese-topped casseroles and pasta salads.
The completed dish was displayed on the cover of the magazine, Food & Home Entertaining. The write-up on the recipe inside the magazine states “Make it in a jiffy” and I can vouch for this; it is very quick and easy to make. It further states: "We love this dish for its ease of preparation and accessible ingredients. It also is great warm or cold, as a starter or main course." The recipe calls for anchovies, which my husband loves. I don’t eat anchovies because they have/had a face;) and as my husband is away in the Sudan, I made the dish sans anchois!

Here's the recipe...

Farfalle with Cherry Tomatoes, Olives and Basil. (Food and Home Entertaining, August 2006)
Serves 4

Sauté 2 finely chopped garlic cloves in 60ml olive oil over medium heat.
Add 500g cherry tomatoes and stir for 2 minutes.
In a mixing bowl, add 100ml olive oil, 8 capers, 1 anchovy,
8 green and black olives and 4 red spring onions, all finely chopped.
Add 60ml fresh basil.
Mix in the tomatoes and season to taste.
Cook 500g farfalle in plenty of salted boiling water until al dente.
Drain, add to the sauce and toss to coat.
Serve with a generous helping of grated Parmesan.

Sunday, February 8, 2009

Traditional African Fare

Emily and Albertina eat the rest of the Xnuush made for my husband. BTW Even though they're both sitting next to the dining table with chairs, they prefer to sit on the floor!
A delicious South African dish : Xnuush
A piece of grilled mutton rib adds a delicious flavour

Every so often my husband asks Emily to cook him Xnuush (Samp and Beans) which is a traditional African dish. Samp and beans is a daily staple for millions of South Africans. Samp is a "degermed" product of maize - the husk and germ have been removed.

Of course, being a carnivore, hubby always grills a piece of mutton/lamb rib to eat with the Xnuush.

African Samp and Beans (Stampmielies)
200 ml dried kidney beans
50 ml samp, rinsed
10 ml salt and fresh black pepper
30 ml butter
Soak the beans and samp in plenty of cold water for about 8 hours. Drain. Bring 1.2 litres of water to the boil in a medium saucepan. Add the samp and beans, cover, and simmer for about 1 1/2 hours until very tender. Season with salt and pepper, add butter and cook uncovered until the mixture thickens.

Friday, January 23, 2009

The Humble Sandwich


Well-made savoury sandwiches are tasty and nutritious
Last night it was my turn to provide eats for after our home cell group (Bible Study). I made my favourite: sandwiches, and of course have posted about it. Even the humble sandwich needs a little uplifting blogging!

Often we look forward to sandwiches on display and are horribly disappointed. Firstly the bread is white, with the crusts curling and the inside part of the sandwich soggy from the filling. Errgh!

I learnt to make a really tasty sandwich at the elbows of a dear friend in Zululand. Her secret, which she passed on to me, was to make them with a generous spirit and a loving heart.

Use only freshly baked brown bread. I prefer to buy what is known as a “round” loaf at our local bakery. It’s actually a normal shaped bought loaf with a raised crust. With an electric carving knife, I cut thin, even slices and place them under a damp cloth.

Meanwhile I place six eggs in a saucepan of cold water and bring to the boil. Then I set the timer and at 8 minutes I remove the pot from the stove, pour off the boiling water and refill with cold water to stop the eggs cooking further.

Drain that water off and peel the eggs. Place altogether in a soup bowl and mash well with a fork, adding a knob of butter. Season with salt and black pepper. Add two tablespoons of low-fat mayonnaise and a teaspoon of Hot English Mustard. Mix well.

Spread two slices of bread at a time with butter and add dollops of savoury egg onto one slice. Spread to edges and close with other slice. Place to the side. Continue until you have the required number of egg sandwiches.

Grate a small block of cheddar cheese and slice one or two firm tomatoes. Sprinkle cheese a slice of buttered bread. Gently blot tomato slices between layers of kitchen towel and lay across the cheese. Sprinkle a little more cheese over that and cover with the other buttered slice.

Using the electric knife again, cut the crust circle off the sandwich piles, and then carefully cut all the remaining crusts off. Cut the sandwiches into four diagonally across the bread. Cut the filled crusts in half.

Line a large platter with mulberry leaves or shredded lettuce. Place each quarter sandwich on the platter to form patterned rows. Sprinkle shredded lettuce over the sandwiches and cover with plastic wrap.

Refrigerate until needed.


Wednesday, December 17, 2008

Traditional Mieliepap


I often make mieliepap for my husband to enjoy as a light meal. Above was a case in point. Instead of eating it with grilled meat and tomato and onion relish, he asked for steamed spinach!
One thing that struck me when I lived in West Africa, was the fact that the local people didn’t eat (or even know)” Mieliepap” there. The staple diet in that part of the continent was rice. Living up there and as South Africans we enjoyed mieliepap with a braai (barbeque) so we’d have to take this heavy item back with us in our luggage.

I’ve seen Lynda posting about puthu and maize meal, so it’s obviously

available in Tanzania. Is there anybody in North or Central Africa reading this post, who can tell me if they are able to get this food-stuff in their part of Africa? I know that it is available in Basingstoke, in the UK. My brother-in-law, who had a large and very successful South African butchers in that area, imported all manner of South African products for sale, one being Mieliemeal.

Mieliepap is staple starch eaten by most South Africans. It is maize which has been ground into flour. It is cooked slowly with water

on top of the stove, depending what type of pap (porridge) you require. You can have mielie porridge: thick, creamy and runny. Else you may have puthu (pronounced poo-too) which is crumbly and slightly dry. Or you can have it in stodgy/sticky lumps called sadza, (pronounced sudzu – with the *a's* as *u's* in *sun*) by which you take a handful of the cooked maize, form a lump by carefully squeezing it in your palm, dip it into tomato and onion gravy and enjoy.

Most of the above cooking methods are long (ranging from 1 – 2 ½ hours). However, a few months ago my husband and I were in Ndumu Game Reserve in Northern Kwa Zulu Natal with his brother and sister-in-law. One evening after a wonderful day of birding (my s.i.l. is a bird fundi and a wonderful guide to have along on a trip such as this one)

and game watching in the bush, we came home exhausted and hungry. The men (as all South African men do,) quickly lit a fire outside our huts and proceeded to braai a selection of meat. My sister-in-law who is a wonderful baker, but a self-confessed non-cook, offered to make the mieliepap. I mentally rolled my eyes, thinking we’d never have supper that night (ha!) Nevertheless, she made a bowl of steaming “sadsa / puthu” within a few minutes - 6 minutes, in fact.

It was deilicious.

Mieliepap - a la sis
ter-in-law

2 1/2 Cups boiling water
1 Cup Braaipap* meal
1 t salt

Mix all ingredients together in a plastic bowl
Microwave on high power for 4 – 6 minutes.
Stir after a minute.
At 3 minutes add ½ tin Cream-style Sweet Corn (optional)
When cooked, add a blob of butter and mix through with a fork.
Serve with tomato and onion relish

*Note: Braaipap is a coarse maizemeal, yellow in colour with bits of gritty mielies in it. Ironically, although this maizemeal is very popular with white South Africans it’s not so with black people. They prefer their maize meal to be superfine (the packet must state this) and snowy white.


Saturday, November 22, 2008

Crumbed Camembert - mmm...

Crumbed Camembert, drizzled with strawberry coulis and served with green fig preserve and Provitas

A few years ago my husband and I were touring the Western Cape on our motorbike. We stopped at for lunch at a restaurant in The Wilderness. We normally never order the same dish (I mean: he loves a steak and I only eat vegetables! ) This day however, we both ordered the Crumbed Camembert and have been hooked on this dish ever since.

When we got home, hubby who enjoys cooking announced that he was going to learn to cook Crumbed Camembert. A few weeks later he bought a wheel of Camembert , I looked up the recipe on the Internet and he set about preparing this delicious treat for us.

It is one of those meals that when you scoop up the last bit (albeit the tasty crumbs or creamy cheese oozing out of the wedge), you sit back with a sigh and reminisce about how divine it was!


Crumbed Camembert and desert lime spice (Jeffrey Eaton )
Serves 4
Cooking / preparing time – about 20 minutes

3 Camembert cheese packs
1 Cup plain white flour
2 Cups breadcrumbs
1 Egg
½ Cup Milk
140 g Lime Marmalade

Method
Cut Camembert wheels into 1/8th wedges
Dip in flour
Lift and place in egg and milk mixture
Lift and roll in breadcrumbs
Allow to stand for about 10 minutes
Dip into egg mixture and crumbs again
Place marmalade in pan and bring gently to the boil.
Remove and set aside
Heat olive oil in pan and shallow fry the cheese wedges
Drizzle strawberry coulis over cheese (I used strawberry jam which I warmed in a saucepan on the stove
Serve with whole green preserved figs and Provita biscuits

Tuesday, October 28, 2008

Hash's Homemade Hamburger Patties

Chef extraordinaire making his Homemade Hamburger Patties !
He works very neatly while preparing food
The finished product - delicious

Recently my younger son, Angus and daughter-in-law, Amanda came over for a hamburger lunch. They love to come and eat what I call, Hash’s Homemade Hamburger Patties. Grant, (whose nickname is Hash) goes to the butchery himself and orders the minced meat for his hamburgers. Then he comes home and prepares these tasty hamburger patties.
Even though he has often made them before, this is first time he has made them since I started my blog. (Ha!) And this means that now he would be photographed while making them. I thought he was going to stop me from taking photos while he was busy, but strangely enough, he didn’t seem to mind and I got some lovely photos.
(Mmm, perhaps he was focusing on his task and didn't notice me and my camera)
Hash’s Homemade Hamburger Patties
500 g minced pork fillet
500 g minced beef fillet
1 onion, grated
1 clove garlic
½ teaspoon baking powder
10 ml mixed herbs
Salt and ground black pepper
1 Egg
Flour to work with

Place all ingredients in a large bowl
Mix together thoroughly using your hands
With floured hands form patties
Place on floured surface/cover with damp cloth
Preheat oven to 180 ° (350 ° F)
Place patties on lightly oiled baking tray

Brush eat patty with vegetable oil
Bake in oven until brown, turning to cook on other side.
Serve on Hamburger rolls with sliced onion, tomato and lettuce
Makes 14 patties